How to Do Interval Training on a Stationary Bike
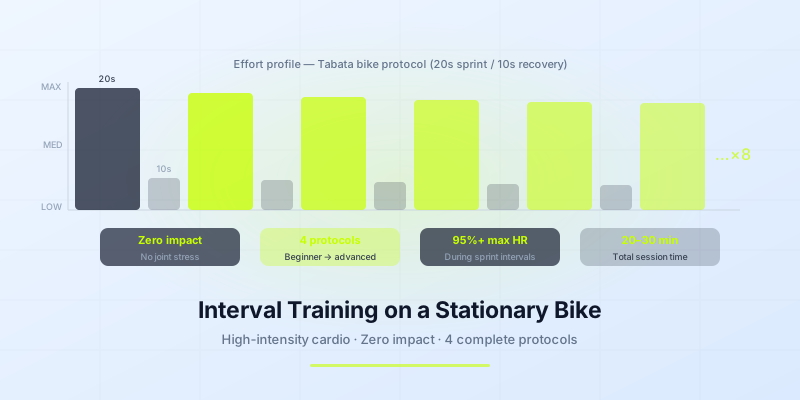
The stationary bike is one of the most effective platforms for interval training. It's low-impact — no joint stress from running — but allows very high cardiovascular intensity. You can sprint at maximum effort on a bike without the landing forces that make running intervals hard on knees, hips, and shins.
Here's how to structure effective interval sessions on a stationary or spin bike, including four complete protocols from beginner to advanced.
Why Bikes Work So Well for Intervals
Instant resistance control: Unlike treadmills, you adjust effort immediately by pedaling harder or turning the resistance knob. This makes true Tabata-style 20-second maximum efforts easy to execute — no acceleration lag.
Low injury risk: Impact forces during cycling are minimal compared to running. This makes bike intervals accessible earlier in a fitness program and appropriate for people with lower-body joint issues.
High ceiling on intensity: A trained cyclist can sustain extremely high power outputs during intervals. Sprinting on a bike can elevate heart rate to 95%+ of maximum, producing the same cardiovascular stimulus as running intervals.
Easy to track effort: Power output (watts), cadence (RPM), and heart rate give objective feedback on interval intensity in a way that's harder to quantify on treadmills or floor-based HIIT.
Setting Up for Bike Intervals
Before starting any interval protocol, get the setup right:
Seat height: When the pedal is at the bottom of the stroke, your knee should have a slight bend (5–10°). Too low strains the knee; too high causes hip rocking and reduces power.
Handlebar position: High enough that your back isn't uncomfortably rounded. Drop bars are fine for experienced cyclists; upright handlebars reduce back strain for beginners.
Resistance vs cadence: Intervals can be done with high resistance at moderate cadence (80–90 RPM, like a climb) or lower resistance at very high cadence (100–120 RPM, like a sprint). Both work — choose based on the session goals.
Warm-up: Always 5 minutes of easy pedaling before intervals. Cold legs produce less power and are more prone to cramping during sprints.
Four Stationary Bike Interval Protocols
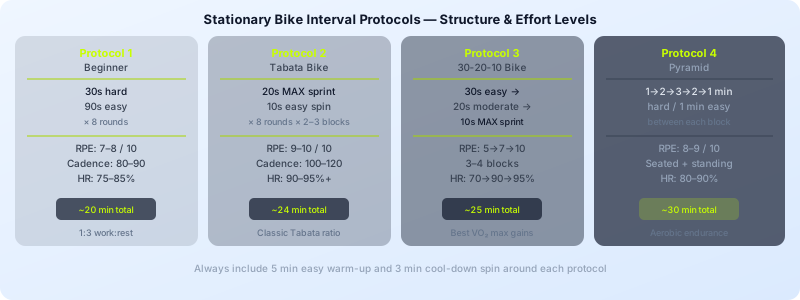
Protocol 1: Beginner Bike Intervals (20 minutes)
Simple on/off structure to introduce the format:
- Easy pedal: 5 min warm-up
- 30s moderate-hard effort / 90s easy recovery × 8 rounds
- Easy pedal: 3 min cool-down
Total session: ~20 minutes. The 1:3 work-to-rest ratio allows full recovery between efforts and is appropriate for anyone new to interval training on the bike.
Resistance: Moderate — you should be breathing hard but able to maintain a smooth pedal stroke throughout.
Protocol 2: Tabata Bike (24 minutes)
Classic 20s/10s Tabata structure applied to the bike:
- Easy pedal: 5 min warm-up
- 20s maximum sprint effort / 10s easy spin × 8 rounds (= 4 min)
- Recovery ride: 2 min easy
- Repeat for 2–3 Tabata blocks
- Cool-down: 3 min
Total session: 20–24 minutes. The sprint intervals should be near-maximum — cadence 100+ RPM with moderate-high resistance. The 10-second recovery is very short; by round 5–6 you'll feel the accumulation.
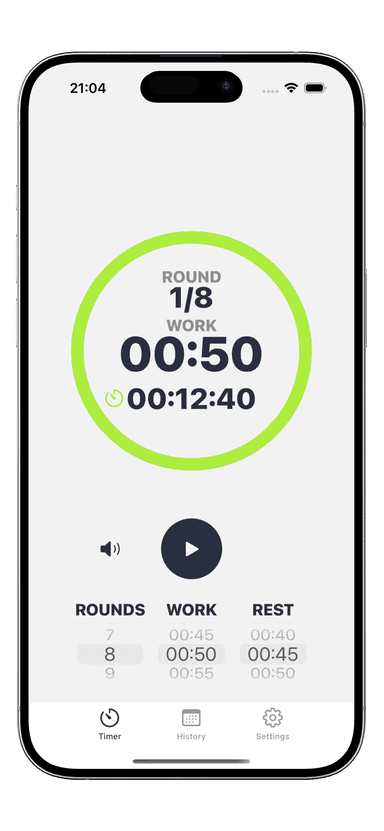
Use an interval timer for the 20s/10s cycle — it's impossible to track manually when breathing hard. The Interval Timer app handles the Tabata structure precisely, giving audio cues for each transition.
Protocol 3: 30-20-10 Bike Protocol (25 minutes)
Adapted from the 30-20-10 running protocol for cycling:
- Easy pedal: 5 min warm-up
- Per block (5 minutes):
- 30s easy → 20s moderate → 10s maximum sprint
- Repeat this 3-interval sequence for 5 minutes (= 5 blocks of 30-20-10)
- Rest: 2 min easy
- Repeat for 3–4 blocks total
- Cool-down: 3 min
Total session: ~25 minutes. The progressively increasing effort within each 60-second block is highly effective at developing aerobic capacity. Research on this protocol shows strong VO2 max improvements in trained athletes.
Protocol 4: Pyramid Intervals (30 minutes)
Intervals that build and descend in duration:
- Warm-up: 5 min easy
- 1 min hard / 1 min easy
- 2 min hard / 1 min easy
- 3 min hard / 1 min easy
- 2 min hard / 1 min easy
- 1 min hard / 1 min easy
- Cool-down: 5 min easy
Total session: ~30 minutes. The pyramid structure lets you push hardest on the longest interval while knowing relief is coming as duration decreases.
How to Measure Effort on a Bike
RPE (Rate of Perceived Exertion): Scale of 1–10. Easy recovery = 3–4, moderate = 5–6, hard intervals = 8–9, maximum sprint = 10.
Heart rate zones: If your bike has an HR monitor or you wear a chest strap:
- Recovery: below 60% max HR
- Moderate work: 65–75% max HR
- Hard intervals: 80–90% max HR
- Maximum sprint: 90–95%+ max HR
Power output (watts): If your bike displays power, track watts during work intervals. Aim to maintain consistent or increasing power across all intervals in a session — power drop-off signals fatigue is limiting output.
Cadence (RPM): During sprint intervals, aim for 100–120 RPM with moderate-high resistance. If cadence drops significantly in the later rounds, reduce resistance slightly rather than grinding at low RPM.
Positioning Your Timer
The interval structure on a bike requires a timer running alongside you. Options:
- Phone propped on the handlebars displaying the timer
- Wireless earbuds receiving audio cues from the timer app
- Smart watch displaying interval countdown
The audio-cue approach is most practical — you can keep eyes on the road or the wall rather than checking a screen. The Interval Timer app plays distinct tones for work and rest transitions, which works well with earbuds during spin sessions.
Programming Bike Intervals in Your Week
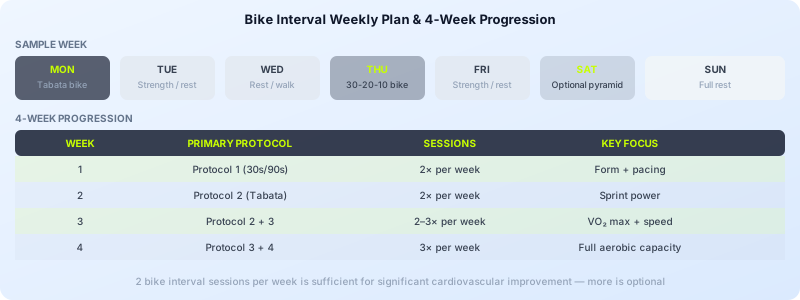
As part of a weekly training program, bike intervals can replace or complement running-based cardio:
- 2× per week is sufficient for meaningful cardiovascular improvement
- Alternate intensity: one Tabata session + one longer pyramid session per week develops both anaerobic power and aerobic endurance
- After strength training: bike intervals work well as a 15–20 minute finisher after lower-body strength sessions — the legs are already warm and the cardiovascular demand transfers to the workout
For those combining bike intervals with strength training vs cardio programming, the bike provides cardiovascular stimulus without adding the impact stress that can accumulate from running multiple times per week.
Common Mistakes on Bike Intervals
Using too little resistance: Spinning at 140 RPM with almost no resistance produces high cadence but minimal cardiovascular or muscular demand. Interval sprints need enough resistance to actually challenge the system.
Sitting the whole time: Standing sprints on a stationary bike dramatically increase muscular demand and power output. Incorporate seated and standing intervals in the same session.
Skipping the cool-down: Blood pools in the legs during intense bike sessions. A 3–5 minute easy spin after intervals helps clear metabolic waste and prevents post-session dizziness or cramps.
Inconsistent effort: If your "hard" intervals vary between 70% and 95% effort from round to round, your data and progress are unreliable. Calibrate each session — decide on a target intensity and hold it.
Download Interval Timer to run any of these bike protocols with precise audio cues — set it once and focus entirely on your pedaling effort.